Get the throttle bodies right and the linkage wrong, and you’ve built a set of ITBs that fights you every time you touch the pedal. I see it constantly. People obsess over bore size and airhorn length, then bolt on a linkage that’s out of sync, badly geared or mounted where it fouls the bay — and wonder why the car is snatchy at part throttle and impossible to idle. So let’s talk properly about the ITB throttle linkage on a Honda K20: cable versus drive-by-wire, over-body versus under-body, the geometry that actually determines how the car drives, and how to synchronise the lot so all four butterflies open as one.
Start with the actuation decision: cable or electronic
Before you touch a bracket, you make one call. Throttle operation on a K20 ITB setup is either a mechanical cable linkage or an electronic throttle actuator (ETA, i.e. drive-by-wire). Both work. They suit different builds.
This matters more on the K20 than on most engines because of what’s on the car already. The stock K20A/A2/A3 uses a cable throttle body — roughly 62mm across the range. But the K20Z3 in the 2006-on Civic Si is factory drive-by-wire, and that stock DBW body isn’t usable for a mechanical ITB conversion. If you’re building a Z3-based engine, you either commit to an electronic actuator that your ECU can map, or you deal with the fact that the pedal and throttle mapping are electronic and plan around it.
My rule of thumb:
- Cable linkage — the default for race and fast-road K-series builds on a standalone or K-Pro-style ECU. Direct, repeatable, nothing to fail electrically, and you feel exactly what the butterflies are doing. It usually wants an idle air system to keep a road car civilised.
- Electronic throttle actuator — reach for it when you want closed-loop idle control, cruise, traction-based torque intervention, or you’re keeping a Z3/DBW architecture. An idle air system isn’t required because the actuator can hold idle itself.
Jenvey’s electronic actuators for these bodies are the ETA2-SF and ETA2-TB — the choice follows whichever throttle body family you’ve fitted. That’s the theme of this whole job: nothing is universal, everything is matched.
Cable linkage: the parts that actually matter
A cable linkage isn’t a single item — it’s a bracket, a spindle-coupling assembly, an adjustable rod and a cable, all specified to your throttle bodies. Get the wrong bracket for your body family and none of it lines up.
Single versus double cable
Jenvey offer both. On their SF-bodied kits (the tapered SF throttle bodies used on most K20 EP3/DC5 setups) the current listed options are the single cable kit (CLS2-SFD, £141.00 ex VAT) and the double cable kit (CLD2-SFD, £206.00 ex VAT). A single cable is fine for the vast majority of builds. A double gives you a second, independent pull — worth it where a rulebook demands a redundant return, or you simply want the security of two paths back to closed.
Over-body versus under-body mounting
This is a packaging decision, not a performance one — but on a K20 in a tight EP3 or DC5 bay it decides whether the kit fits at all. Jenvey list both: over-body (e.g. CLS2-TBO1, £141.00) and under-body (CLS2-TBU1, £141.00, plus the SF/ST underslung CLS2-SFU1 at £157.00). Under-body tucks the linkage below the throttle bodies and away from the bonnet line and airbox; over-body keeps it accessible for adjustment. Choose around your inlet, your airbox and your bulkhead clearance — measure, don’t assume.
The advantage of a throttle quadrant (like the GMR kit)
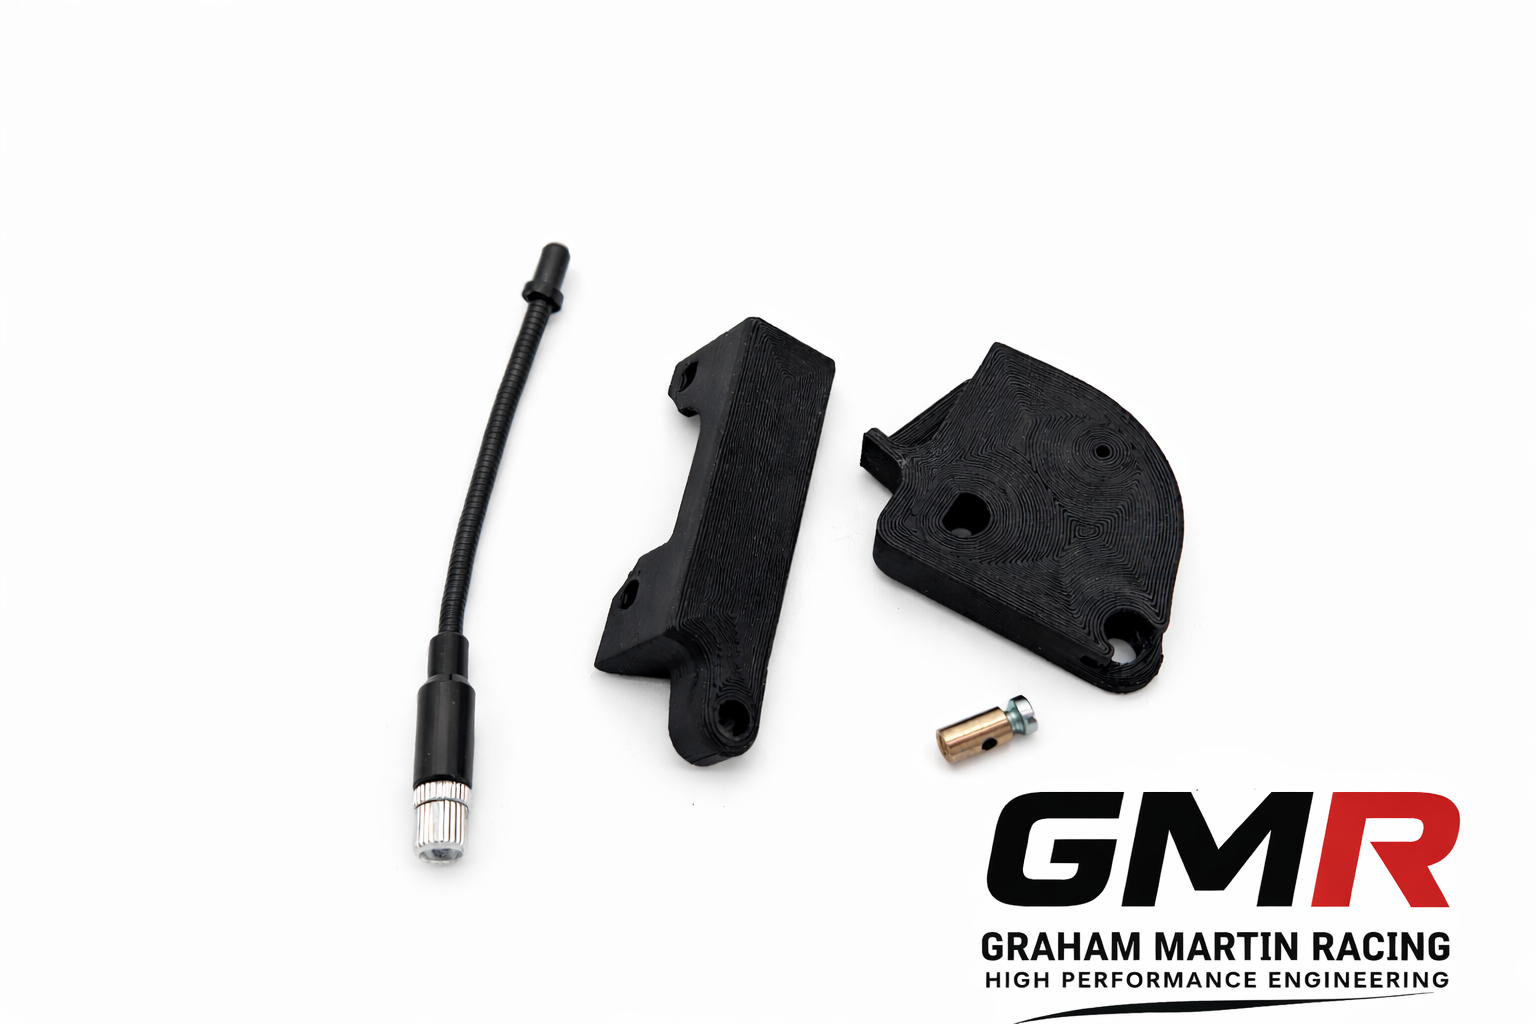
This is where I’ll make the case for a quadrant-based linkage over a plain lever arm. The big win with a throttle quadrant like the GMR kit is the non-linear throttle application to pedal ratio. Because the cable acts on a cam-profiled quadrant rather than a fixed-radius lever, the ratio changes through the pedal travel — so you get a more progressive initial throttle opening off idle, then a quicker rate as you push on. That’s exactly the behaviour you want on ITBs, where most of the useful area is uncovered in the first slice of butterfly rotation. On top of that it’s much less complicated and gives smooth operation — fewer bellcranks and pivots to introduce slop — and the cable can be positioned in any direction thanks to the flexible cable adjuster, which is a genuine gift in a cramped K20 bay. Keep the cable run as straight as you sensibly can, though; a flexible adjuster lets you route it anywhere, but tight bends add friction to the pull.
The adjustable rod is where the geometry lives
The threaded adjuster — Jenvey’s M6 x 37mm (M6X37-ADJ) on these kits — is not just a length shim. The effective lever ratio between your cable pull and the throttle spindle rotation sets how aggressively the butterflies open per millimetre of pedal. Get this wrong and you’ll build in the exact snatchiness people blame on “big ITBs”.
Why linkage geometry decides driveability
Here’s the mechanism people miss. Throttle response isn’t about bore size in isolation — it’s about how much butterfly cross-sectional area you uncover per degree of spindle rotation, and how that rotation maps to your foot.
Take the single-throttle world as an illustration: going from a 62mm to a 74mm body means a much larger open cross-section for the same butterfly angle. Same foot movement, more airflow, higher manifold pressure earlier. It feels punchy off the bottom but gives you far less fine control at low load — past roughly 40–50% throttle you often see no further change in MAP. It’s oversized for the job.
ITBs concentrate this effect because you’ve got four butterflies and a direct short path to the valves. That’s exactly why the linkage lever ratio is a tuning parameter, not an afterthought. A slightly slower initial ratio — more pedal travel for the first slice of butterfly opening — transforms part-throttle manners without costing you a thing at wide-open throttle. I set this deliberately on every build, and it’s one of the reasons a properly specified kit drives so much better than a bag of parts thrown together.
Sizing feeds into this too. A useful benchmark: OEMs spec around 10 mm² of throttle area per horsepower; tuners push to 15 mm². Go beyond about 10–12 mm²/HP and low-load control gets nervous. On the K20, that maps to the bodies people actually run — Jenvey 48mm parallel or 51mm tapered SF, AT Power 45/50/55mm, RZcrew 45–55mm billet. Bigger isn’t automatically better, and if you’ve oversized the bores, sympathetic linkage geometry is how you claw driveability back. If you’re still choosing bodies, our guide on K20 individual throttle bodies for sale walks through sizing against your head and target power.
Match the bracket to your bodies — this is not optional
The single most common linkage mistake I see: the right linkage kit, the wrong mounting bracket. Jenvey’s own guidance is blunt about it — the adjustable single cable kit fits all their bodies, but you also need the correct mounting bracket for your specific throttle bodies. SF bodies, TB bodies and the underslung SF/ST variants each take their own brackets.
It’s the same principle we apply to everything: a linkage designed for a specific body family, on a manifold designed for a specific head, actuating bores sized for a specific power target. That’s the opposite of the “close enough” approach, and it’s why we’re firm that engine-specific beats universal every time. A K20 bay is tight; a bracket that’s 5mm out is a bracket that fouls something.
Synchronisation: the job that makes or breaks the setup
Four butterflies must open as one. If they don’t, you’ve got cylinders fighting each other, an idle that hunts, and a lambda trace that looks like a seismograph. Synchronising is straightforward if you do it methodically:
- Set a mechanical baseline first. Back all bodies to their stops, then bring each butterfly to an identical small opening using the individual body adjusters — not the linkage. The linkage should arrive last.
- Balance airflow, not just position. Use a flow meter across all four bodies at idle and adjust until they read within a hair of each other. Position is a starting point; flow is the truth.
- Set the linkage ratio and free play. With the bodies balanced, adjust the M6 rod so the cable takes up cleanly and all four crack open together off idle. A touch of free play at closed is correct — it guarantees every butterfly returns fully home.
- Confirm the pedal maps sensibly. Check you reach wide-open throttle at the pedal stop, with margin, and that the first 20% of pedal gives you controllable, progressive opening.
On a road car, a small idle air bypass makes cable linkage genuinely liveable — it lets you keep the butterflies properly shut for the best part-throttle control while the bypass handles idle. With an electronic actuator you don’t need one; the actuator holds idle itself.
Where a bespoke linkage earns its money
Off-the-shelf Jenvey kits are excellent and cover most EP3/DC5 builds. But I’ll be honest about when they don’t: unusual airbox packaging, a raised or repositioned engine, a competition return requirement, or a lever ratio you genuinely need dialled for a specific cam and bore combination. That’s where we build linkage to suit the exact car — bracketry made to fit, ratio set to the engine’s character, routing that clears everything. It’s the same philosophy behind the rest of our K-series intake work, from the bodies to the velocity stacks that finish the airflow path. Related: for one-off bracketry and complex parts, see how 3D printing fits the motorsport workflow @ Ask The Nozzle.
FAQ
Can I use a cable linkage on a drive-by-wire K20Z3?
Not with the stock Z3 throttle body — it’s electronic and not usable for mechanical actuation. You either fit a cable-operated ITB kit with a standalone or K-Pro-style ECU that expects a cable input, or run an electronic throttle actuator (Jenvey ETA2-SF/ETA2-TB) mapped to your ECU. Trying to bodge a cable onto DBW architecture causes more problems than it solves.
Do I need a single or double cable linkage kit?
Single (e.g. Jenvey CLS2-SFD, £141.00 ex VAT) covers the vast majority of fast-road and club builds. Go double (CLD2-SFD, £206.00 ex VAT) where a rulebook demands a redundant return or you want two independent paths back to closed.
Why is my K20 snatchy at low throttle with ITBs?
Usually the linkage lever ratio is too fast and/or the bodies are oversized, so you uncover too much butterfly area per millimetre of pedal. Slowing the initial ratio on the adjustable rod and confirming synchronisation almost always fixes it — with no loss at wide-open throttle. A quadrant-based linkage like the GMR kit helps here too, because its non-linear ratio gives a more progressive initial opening by design.
Over-body or under-body linkage on an EP3?
It’s a packaging call. Under-body tucks the linkage away from the bonnet and airbox in a tight bay; over-body stays accessible for adjustment. Measure your clearances first — on a K20 there’s no room for guesswork.
Sort the actuation choice, match the bracket to your bodies, set the geometry deliberately and synchronise properly, and a K20 on ITBs is a joy to drive — crisp, progressive and repeatable. Skip any of those and no amount of bore is going to save it. If you want it done right for your exact car, that’s what we do. We’re Northampton-based, ship free across the UK over £100, and we’d rather build you the correct thing once than the “close enough” thing twice.
Related: Throttle Bodies for Kit Cars: How to Choose a Set That Actually Fits and Performs
Related: Throttle Body Linkage Kit: How to Get the Actuation Right for ITBs and Single Bodies
Related: Jenvey Airbox: How to Choose and Fit One That Actually Distributes Air Evenly