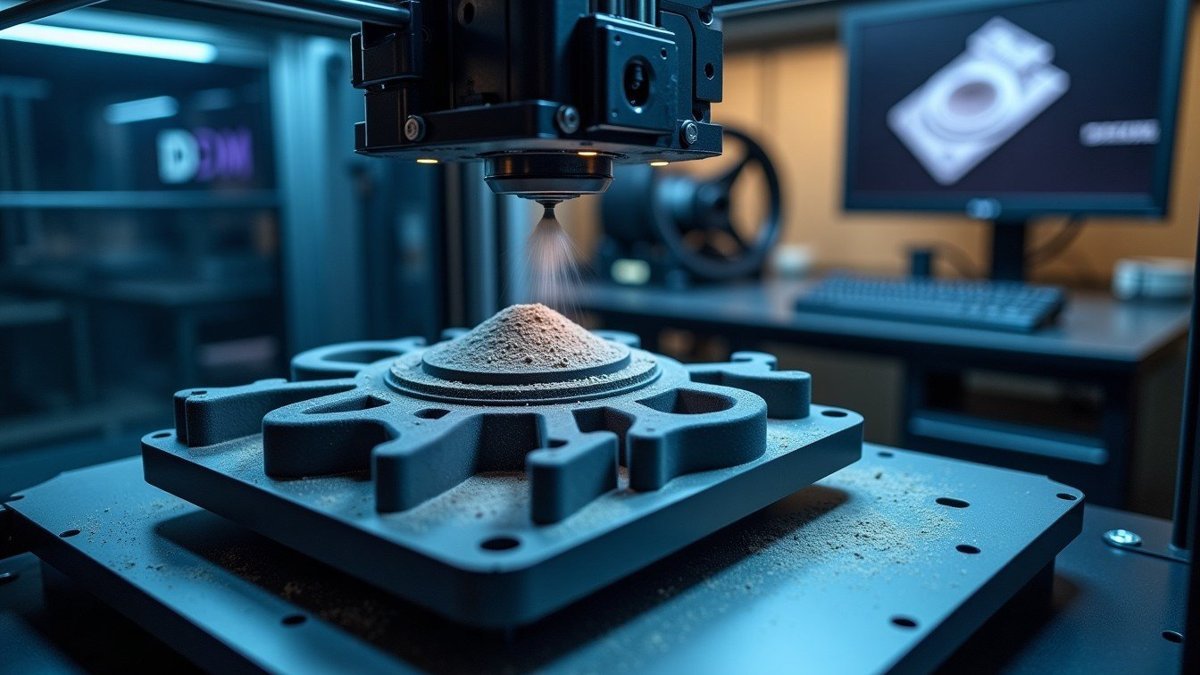
If you’ve ever sent a 3D model off to be printed, machined or laser-cut and had a finished part land on your desk a few days later, you’ve already brushed up against digital manufacturing. But what is digital manufacturing, exactly? In short, it’s the practice of designing, simulating and producing physical parts using a connected chain of digital tools — from CAD software through to CNC machines, 3D printers and quality-control scanners — with data flowing between each step rather than paper drawings and manual handoffs.
It’s a term that gets thrown around a lot, often dressed up in buzzwords. So let’s strip it back and look at what it actually means in practice, why it matters for hobbyist makers and small workshops, and how you can start using these methods yourself without buying a factory’s worth of kit.
What is digital manufacturing in plain English?
Traditional manufacturing relied on a sequence of largely separate activities: an engineer drew a part, someone produced paper drawings, a machinist interpreted those drawings, and parts were inspected by hand afterwards. Each handoff was a chance for errors to creep in and information to get lost.
Digital manufacturing replaces those gaps with a continuous digital thread. The same 3D model that the designer creates is the model that drives the machine, informs the inspection, and feeds back into the next revision. Nothing gets re-drawn or re-interpreted along the way. The result is faster turnaround, fewer mistakes and far better repeatability.
Put simply: digital manufacturing is making physical things where the digital model — not a paper drawing or a person’s memory — is the single source of truth.
This sits neatly alongside the broader discipline of performance engineering, where the goal is to extract the best possible result from a part or system. Good digital workflows are what make that level of precision repeatable.
The core building blocks
You don’t need every piece of the puzzle to get started, but it helps to know what the full picture looks like. A typical digital manufacturing chain includes:
- CAD (computer-aided design): where you model the part — Fusion 360, SolidWorks, FreeCAD, Onshape and the like.
- CAM (computer-aided manufacturing): software that turns your model into toolpaths or print instructions (G-code, for instance).
- Simulation and CAE: stress analysis, flow simulation or print-failure prediction, so you catch problems on screen rather than on the bench.
- Fabrication hardware: 3D printers (FDM, SLA, SLS), CNC mills and lathes, laser cutters and waterjets.
- Inspection and metrology: 3D scanners, CMMs and even calibrated callipers feeding measurements back into the loop.
- Data management: version control and file management that keep everyone working from the same revision.
The magic isn’t any single tool — it’s the way data passes between them with minimal manual re-entry.
Digital manufacturing vs additive manufacturing
People often use “digital manufacturing” and “3D printing” interchangeably, but they’re not the same thing. 3D printing (additive manufacturing) is one production method that happens to sit inside the digital manufacturing umbrella. Digital manufacturing also covers subtractive methods like CNC machining, formative methods, and everything that surrounds production — design, simulation and inspection.
So a desktop 3D printer is a digital manufacturing tool, but digital manufacturing is a much wider idea about how the whole workflow connects together. Related: see how 3D printing fits the motorsport workflow over at Ask The Nozzle.
Why it matters for makers and small workshops
You might assume this is purely an industrial concern, but the same principles deliver real benefits at the hobby and small-business scale:
- Faster iteration: change the model, regenerate the toolpath, print again. You can run several design revisions in an evening.
- Repeatability: a part you printed last year can be reproduced identically today, because the recipe lives in the files.
- Lower waste: simulating before cutting means fewer scrapped blanks and failed prints.
- Customisation on demand: parametric models let you produce variants — a bracket sized for a specific frame, say — without starting from scratch.
- Easy collaboration: cloud CAD lets you share a project and have someone else machine it accurately on the other side of the country.
A concrete example
Say you need a custom mounting bracket. In a digital workflow you’d model it parametrically in CAD, run a quick stress simulation to check it won’t flex under load, export it to your slicer or CAM package, print or machine it, then scan or measure the result and feed any tweaks straight back into the model. The next time you need that bracket — or a slightly larger version — you change one dimension and the whole chain updates. That’s the digital thread in action.
Common challenges (and how to avoid them)
It’s not all frictionless. A few things that trip people up:
- File format chaos: STEP files preserve geometry far better than STL for machining; use the right format for the job and keep a master native file.
- Tolerance assumptions: the part on screen is perfect; the printed or machined one isn’t. Design with realistic tolerances and test fit early.
- Version sprawl: “bracket_final_v3_REAL_final.stl” is a warning sign. Adopt a simple naming convention or proper version control early.
- Material reality: a simulation is only as good as the material data you feed it. Validate against a real test part where it matters.
How to get started without a big budget
You can build a capable digital manufacturing setup at home for surprisingly little:
- Pick a CAD package you’ll actually learn. Fusion 360 has a free hobbyist tier; FreeCAD is genuinely free and open source. Stick with one and get fluent.
- Get a reliable 3D printer. A well-tuned FDM machine in the £200–£500 range will teach you most of what you need about the design-to-part loop.
- Learn the export-and-slice step properly. Understanding how your slicer interprets a model is where most quality gains hide.
- Measure your output. Even a decent pair of digital callipers turns guesswork into data you can act on.
- Document your process. Note settings, materials and revisions so you can reproduce a good result later.
Related: a gcode pre-flight checklist from Ask The Nozzle is a handy way to catch slicing problems before they ruin a print.
If you want to understand how these workflows scale up into serious, precision-driven environments, our piece on high performance engineering is a good next read.
Frequently asked questions
Is digital manufacturing the same as Industry 4.0?
Not quite. Industry 4.0 is the broader vision of connected, data-driven factories — including sensors, automation and the Internet of Things. Digital manufacturing is the design-and-production engine that sits at the heart of it. You can practise digital manufacturing at home without anything resembling a smart factory.
Do I need expensive software to do it?
No. FreeCAD, Onshape’s free tier and open-source slicers like PrusaSlicer or Cura cover the essentials. Paid tools add convenience and advanced simulation, but they aren’t a barrier to entry.
What’s the difference between digital manufacturing and CNC machining?
CNC machining is one production method within digital manufacturing. Digital manufacturing is the wider workflow — design, simulation, fabrication (which might be CNC, 3D printing or laser cutting) and inspection — all linked by shared digital data.
Can a one-person workshop really benefit from this?
Absolutely. The repeatability, faster iteration and reduced waste are arguably more valuable to a solo maker, where every wasted blank or failed print costs you time and money directly.
The takeaway
So, what is digital manufacturing? It’s the connected, data-driven approach to making physical parts where your digital model drives every step — design, simulation, production and inspection. It isn’t reserved for big factories. With a decent CAD package, a 3D printer and a disciplined approach to your files and measurements, any maker can put these principles to work and get more accurate, repeatable results with less waste.
Related: From Prototype to Production: How 3D Printing Became a Real Manufacturing Method